
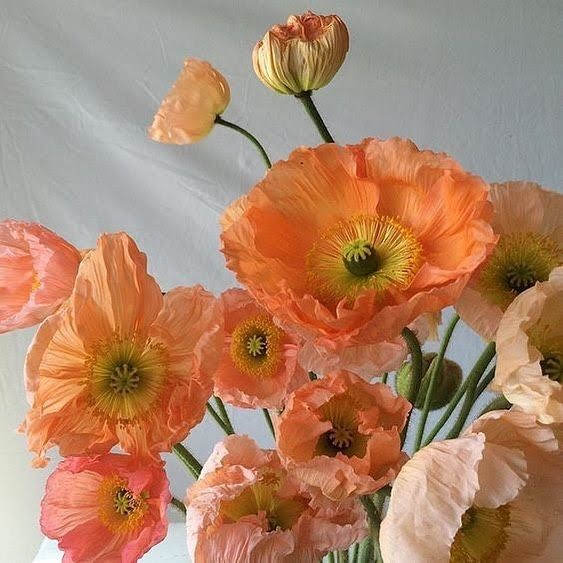
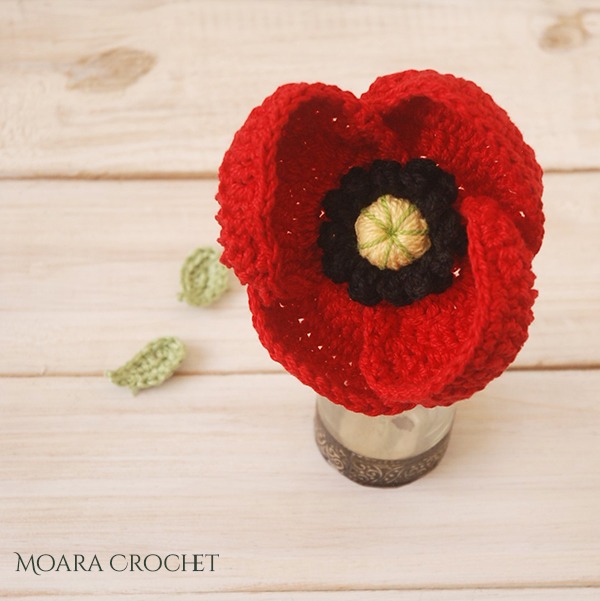
It is already week four of my free crochet flower challenge. Today I am sharing how to make a Crochet Poppy. I hope you had a wonderful Easter Weekend & managed to celebrate some Easter festivities with your family. I love Poppy flowers due to their delicate almost paper like petals, which always make me want to cup the flower in my hands. Poppies come in a variety of shapes & colours with the field Poppy holding a special meaning of ‘Remembrance’ for us from the UK. So you can choose to follow my crochet flower pattern to make a bunch of Icelandic pastel poppy flowers or a single red crochet Poppy to wear as a Remembrance pin for Armistice Day on November 11.
This is the FOURTH pattern in a series of FREE CROCHET FLOWER patterns I have & will be sharing with you as we all try to stay indoors with our loved ones through the coming days & weeks.
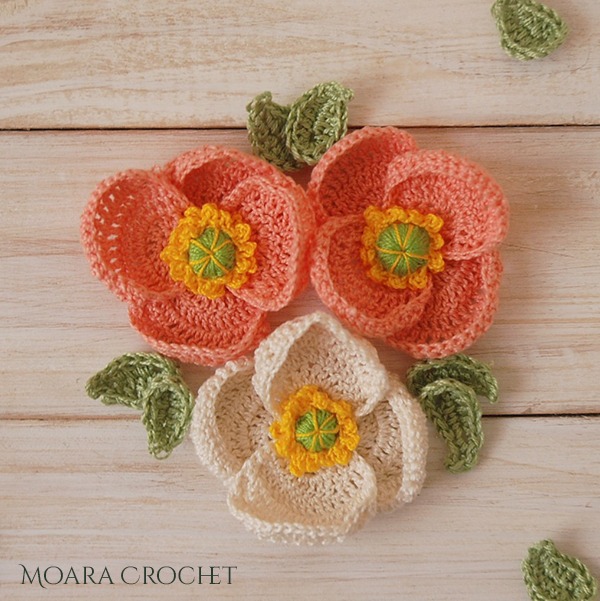
My free Crochet Poppy pattern is written below with a simple step by step written photo tutorial or if you prefer a video tutorial, I have also made a Youtube video.
Materials
- 50 meters cotton yarn (or any yarn from your stash)
- 15 meters cotton yarn in a contrasting colour
- 5 meters of cotton yarn for the centre
- 1 meter of contrasting cotton yarn
- Smallest crochet hook to use with your yarn
- Yarn needle
- Scissors
- 20cm florist wire
- Cutting pliers
Gauge: N/A. Use the smallest crochet hook you can with your chosen yarn to create tight stitches, this will help your petals keep the form & not flop.
Size: With my lace yarn & 1.75mm crochet hook my Crochet Poppy flower is 6cm in diameter.
Notes: The petals are worked individually then attached in sets of two. The Stamen & Stigma are made separately then sewn together. The wire will be attached next before the final assembly of all the pieces.
How to make a Crochet Poppy – Petals (make 4)
Row 1: Chain 4 (count as dc, ch1), 7dc into the 4th chain from the hook. Turn. Total: 8dc.

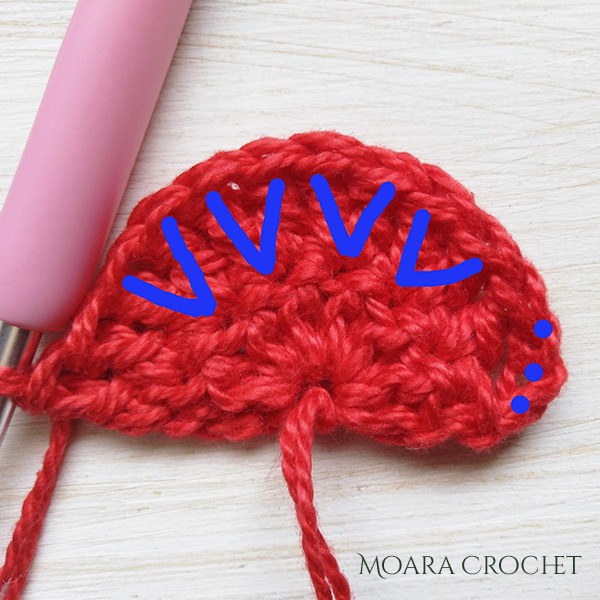
Row 2: Ch3 (count as dc), dc, dc inc., dc inc., dc inc., dc inc., 2dc. Turn. Total 12dc.
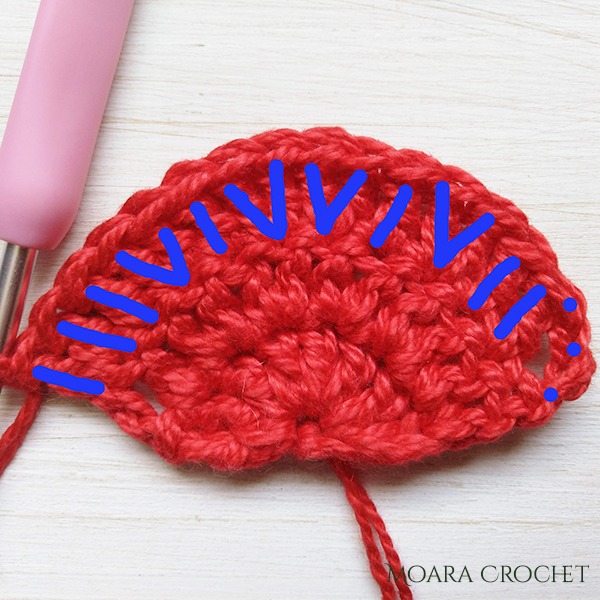
Row 3: Ch3 (count as dc), 2dc, dc inc., dc, dc inc., dc inc., dc, dc inc., 3dc. Turn. Total: 16dc.
Row 4: Ch3 (count as dc), 15dc. Turn. Total: 16 dc.
Row 5: Ch1, skip st, 2sc, 10dc, 2sc. Turn.
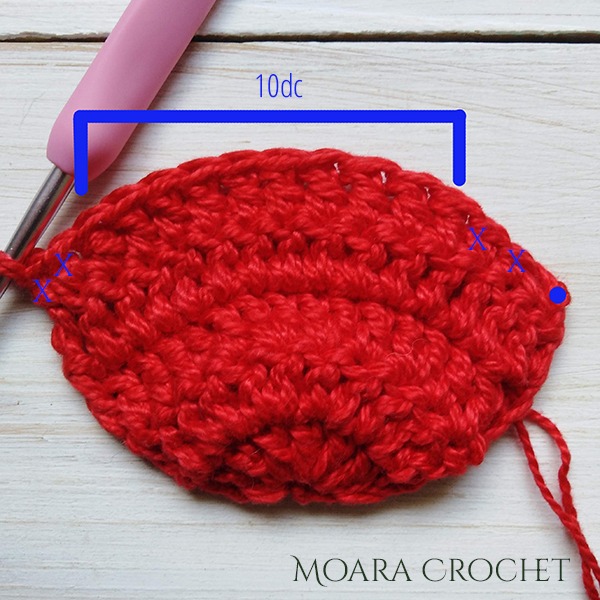
Row 6: Ch1, skip st, 3sc, 3dc, 3dc inc., 3dc 3sc, sl st into ch1 made at the beginning of Row.4.

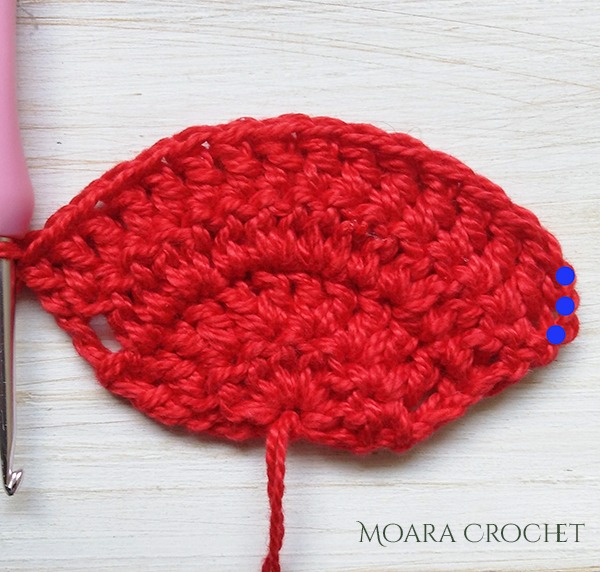
Row 7: Turn to work sc down the side of your petal. Ch1, sc into the same, place 2sc in each dc row (8sc in total), sc in the foundation chain, 2sc in each dc row (8sc in total), sc in sc st of row 5, sc in chain 1 from row 6, 15sc across the top of the petal, sc in sl st from row 6, sl st into first sc. Total: 36sc. Fasten off & weave in your ends on 2 petals. LEAVE A LONG TAIL 30cm ON TWO PETALS.

Once you have made al four petals, align two petals & using the long tail connect the two petals at the centre 3 stitches from the foundation (as shown below). Repeat for the 3rd & 4th petal.

Stigma
To help demonstrate this technique I have also made a crochet video showing how to make a crochet puff button.
Row 1: Ch4, sl st into the first chain to make a foundation circle.

Place as many sc stitches you can into the centre of the circle.

Now sc over the first row a sc, pushing your stitches back behind the circle to create a doughnut shape, continue all the way around, repeating sc over this second row if needed until your crochet centre hole if no longer visible. On average this will be about 50sc stitches. Fasten off & leave a long tail.

Using your contrasting yarn, thread 30cmof yarn onto a tapestry needle. Insert the needle from the underside (flat bottom) and wrap over the doughnut shape & inset again from the underside. Repeat this until you create your desired effect, I continued until I had 7 contrasting lines over my button. Fasten off & weave in your ends.

Stamen
Row 1: Contrasting Yarn (photos shown 2 coloured yarns as it is stitches are clearer in green than black for illustration) Make a magic circle, ch3 (count as dc), 11dc into the centre, sl st into the FRONT chain ONLY. Pull the circle shut. Total: 12dc.

Row 2: Ch3, sl st into 1st chain, *sl st into the front chain of the next st, picot (chain 3, sl st into 1st ch)* repeat * 10 times, sl st into the first st, Fasten off tie in one end & leave a long tail 30cm. Total: 12 picots.
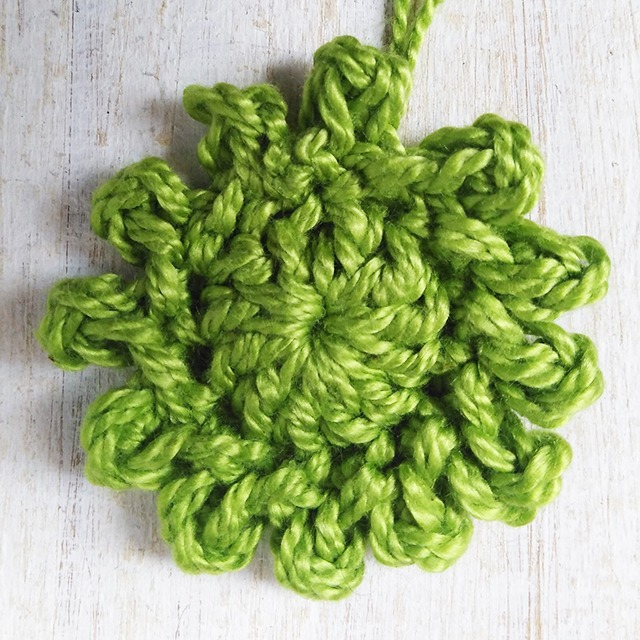
Row 3: Ch4, sl st into 1st chain, *sl st into the back loop of the next st, picot (chain 4, sl st into 1st ch)* repeat * 10 times, sl st into the first st, Fasten off tie in one end & weave in the ends. Total: 12 picots.

Using the long tail from the Stigma attach the crochet button to the centre of the Stamen.

Stem
Step 1: Fold the florist wire in half & ties insert the ends into the foundation chain created from a set of petals. (As shown below).
Step 2: Fold the florist wire over to secure your wire in place, twist the wire below the petal until the base.

Flower Assembly
Place the 2nd set of petals on top of the first set at a 90 degree angle then place the Stamen motif on top, using the long tail from row 3 of the stamen sew through both layers of petal and back up through the stamen continuing around the motif until all the petals are attached. Fasten off & tie in your ends.

Congratulations you have made your Crochet Poppy Flower. I would love to see you crochet creations, please tag me on @moara_crochet on Instagram to share your work.
I hope you have enjoyed my Crochet Poppy Flower pattern, please come back next Monday for my next free crochet flower pattern. Have a wonderful week.

WANT TO MAKE MY CROCHET POPPY FLOWER?
PIN IT TO YOUR CROCHET OR CRAFT BOARD TO SAVE FOR LATER!


FIND ME ON

FOR MORE FREE CROCHET PATTERNS!
Next Weeks Free Crochet Pattern
Beautiful pattern. Thank you so much!
Pingback: Crochet Flower Ideas and Free Patterns - Pattern Center
Pingback: Crochet Poppy Flower Free Patterns
Hello!
I am in love with your flower patterns and have tried the Hydrangea and the roses with the leaves patterns. Thank you so much for doing these!
Crocheting has been helping me through some tough times for me.
I wanted to pick up the Poppy flower.. wanted to see if there is another leaf pattern for the leaves you have in the picture….
Pingback: Remembrance Poppy - Free Crochet Pattern - Nana's Favorites
Thank you so much for this beautiful pattern. I was looking for a nice poppy and yours was the one.
Thank you
Thank you so much for the pattern. And ideas for making poppies.
gorgeous flowers. Very kind of you to make these available. Thank you so much.
Thank you so much for your beautiful poppy pattern Roseanna. I, along with all your other fans and admirers appreciate your kindness and craft. Sherie Rodrigues.
Pingback: Beautiful Poppy Flower Free Crochet Pattern Ideas - Carolinamontoni.com
Pingback: 35 Stunning and Easy Crochet Flower Patterns for All Crocheters - Stitch11
Pingback: Crochet Poppy Flower Free Patterns - qnews5
Pingback: 20 Free Crochet Flower Patterns {Easy PDF Pattern}
Pingback: 25+ Beautiful Crochet Flower Patterns For Bouquets and Vases!
Thank you for these instructions. I plan to use some of the flatter designed flowers to decorate card fronts.
These are gorgeous. I’ve been making baby girl beanies lately and wanted to add something else to them. Now, I do! Thank you.
Thank you!